When I tell people that we are having concrete floors poured in parts of our house, I have a feeling their first thought is this below. After all, it was my thought the first time I heard about it too.

Not so, my friends. When I say concrete floors, I want you to think of this:


Ha! Sorry for the bite size pictures. Consider this a morsel of things to come. :) The last two pictures (if you can find your bifocals) show the color that we are going to use called Fawn. It's not the black with the K9, but the caramel with brown splotches around it.
We wanted to pour concrete in 3 different areas: hallway, dining room, and around the fireplace. You may be wondering how we came to decide to do concrete in the first place. Well, that began with the hallway. When we bought the house the hallway had some bumps and dips where the foundation had sagged. The foundation was the first thing we had fixed and although our contractor said, it was built back up to par, it would not be suitable for a game of marbles. :) It still had bumps and dips, but all in all was propped back up to normal. We had some parquet flooring in the hallway that we ripped up and found old linoleum underneath. Under the linoleum was the great possibility of discovering
aspestos and so we decided to leave the linoleum because
aspestos is dangerous when disturbed and it is advised to just leave it alone. SO, we were left with two options: 1- concrete flooring or 2- tile. We were discouraged by the thought of tiling as it is very hard to make an even surface and to keep the tiles from popping up as we experienced in our last house renovation. Adam had tiled a bathroom and after a couple months, a few tiles would just pop up in the corner and we ended up having to take them all up and put down linoleum tiles. So, having a friend in the concrete biz, we called up Joe and put him to work.

Adam and I did all the prep work (along with the help of a friend, Andy. Thanks!) and there were a few steps. First step was laying down plywood in all of the areas. This picture above is the laundry room and also the last area that needs
sheetrock on the walls.

The hallway

Hard worker Adam. He is seriously over here every night. We are so ready to relax!

2
nd and 3rd steps were to lay down tar paper and then diamond lathe on top. That stuff is brutal. The diamond lathe is rough cut metal and cut Adam's hands up pretty bad. I also don't recommend you transporting this in anything but the back of a truck as we learned the hard way after it snagged the ceiling of my mother-in-law's Ford Expedition. I know, I know.

Once the lathe is
layed you have to staple it to the floor with a staple gun. That was my job.

The next day, I came over to find this! Wet concrete in the hallway.

You can see Joe at the end of the hallway pouring out the last little drips of the self-leveling concrete. He had ordered just enough of what we would need and so absolutely all had to be accounted for. He had to scrape and scrape with his giant squeegee thing to make the concrete stretch as far as possible.

Ta
Da! Just makes you want to get your
rollerskates and disco ball out. :)

Joe works with these spiky shoes so he can perform miracles and walk on water...er... concrete.

Man of the hour, Joe.
 I was able to snap some better pics of the oak floor too. The dark spot is what they will look like when they're finished after they get a coat of poly on them.

 Back to Joe working on the patches of floor on both sides of the fireplace.

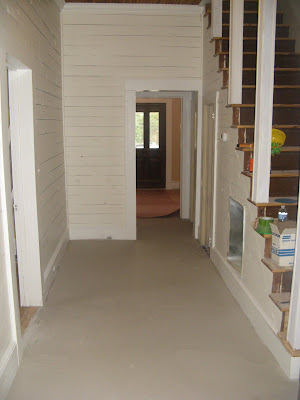 This is what the concrete looked like after drying overnight. We were able to walk on it, but Joe has to come back on Monday and fix some areas where the lathe was showing through.

 This is what the bedroom looks like now that the floor is sanded. I'm going to move that chandelier into the dining room and spray paint it a kelly green to match my dishes.
 Hardwoods in the sitting room.
 Joe came back over the next day, this morning, to work on the fireplaces a little bit more.
 He was working so hard and was trying to get out of there to be at another appointment on time.
 Greta and I were admiring a red cardinal and I was having fun walking on our new dining room floor when Greta darted over the fireplace patch that Joe had just worked on.
 It startled Adam and I so much that we both yelled, "Nooooooooooo!!!" and Greta ran back through the concrete and into her daddy's arms. Here you can see her shoes tell the story.

And so does the concrete. :) That was our cue to leave, but apparently Joe was able to fix it in minutes. Phew!

 Phase 2
 Phase 3
 Phase 4- Complete!


 View from the stairs looking down on the hallway.
 Isn't it so pretty?
 Laundry room.
 View from hallway looking into entry way.
 View from kitchen looking into living room.
 d off the baseboard to protect it from overspray. If we ever wanted to change the color, all we'd have to do is buy some stain and spray some new color on top. The concrete underneath wouldn't ever have to be messed with. Joe was impressed with the job the sprayer did and so were we! If ever you have a concrete job in the Charlotte area, check out


